Native Linux GUI – gtkplastic
It is finally here! We went all the way from our old portable user interface (monoforms anyone?) to the brand new, GTK based, Linux native GUI. And here it is how it looks like:
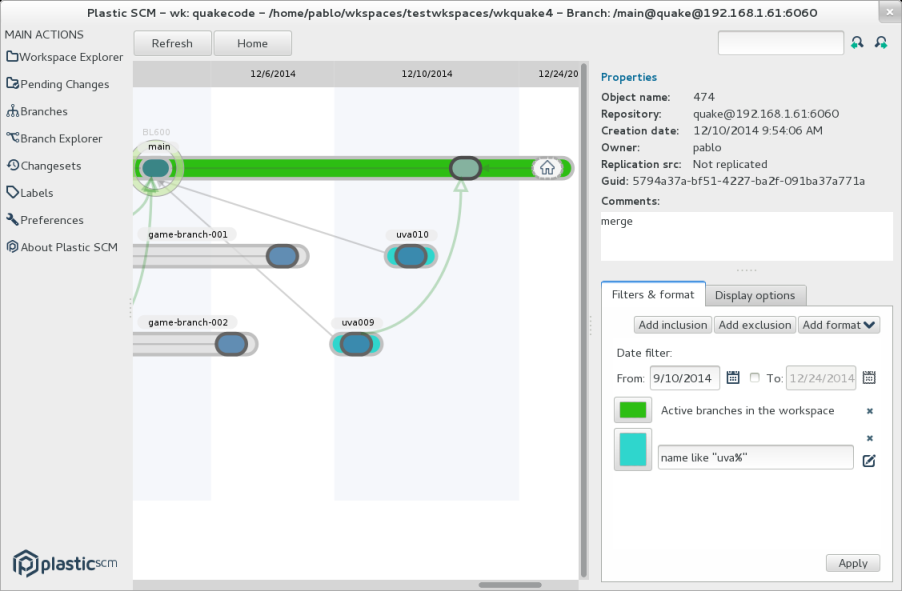
The more I get used to the GTK look and feel, the more I like it. Needless to say that it is the easiest to program compared to Mac and WinForms (and WPF!).
This new “go native” GUI initiative is not only for Linux, as you all know we’ve released a Cocoa based Mac OS graphical user interface which is under heavy development now.
The goal is to get rid of “one size fits all” solutions and provide the native look and feel on Windows, Linux and Mac.
How can you install it?
Where, quite easy, just go here and follow the instructions to install the client version: http://www.plasticscm.com/plastic-for-linux/index.html. But instead of installing plasticscm-client go and install plasticscm-client-gtk.
Detailed instructions for Ubuntu 14.04
While following the instructions in the website is quite easy, I’ll paste here the steps I followed this morning while installing on Ubuntu.
Note: while it works great on Ubuntu I rather prefer the look and feel it has in OpenSUSE :-)
Let’s go. First edit /etc/apt/sources.list (as root or using sudo).
And add the following lines:
# PlasticSCM 4.1 repository
deb http://www.plasticscm.com/plasticrepo/4.1/Ubuntu_14.04/ ./
# PlasticSCM 5.0 repository (Needed for both 5.0 and 5.4!)
deb http://www.plasticscm.com/plasticrepo/5.0/Ubuntu_14.04/ ./
# PlasticSCM 5.4 repository (Please note that you'll need the 5.0 repository as well!)
deb http://www.plasticscm.com/plasticrepo/5.4/Ubuntu_14.04/ ./
Then install the correct keys, just copy/paste the following on your console:
wget http://www.plasticscm.com/plasticrepo/4.1/Ubuntu_14.04/Release.key -O - | sudo apt-key add -
wget http://www.plasticscm.com/plasticrepo/5.0/Ubuntu_14.04/Release.key -O - | sudo apt-key add -
wget http://www.plasticscm.com/plasticrepo/5.4/Ubuntu_14.04/Release.key -O - | sudo apt-key add –
Update your repositories:
apt-get updateAnd then install:
apt-get install plasticscm-client-gtkAnd you’re done. Can’t be easier :P
First steps
Run gtkplastic and you’ll the config window will show up if you didn’t have any Plastic version previously installed:
This window uses the same mechanism we introduced in the latest versions of the Windows GUI and it comes with several improvements. It is much simpler since it just asks you for the server and figures out the authentication mode and everything. This step used to be a wizard, but we removed all the extra steps :-)
Once you connected to your server, the “switcher” will show up as follows:

It is just a window to handle workspaces and repositories. In my case it is empty and I’ll create a first workspace to start working with Plastic. It is still in progress, the buttons on top will end up being tabs soon.
If you click on “repositories” you’ll see the list of all your available repos, in my case something like this:
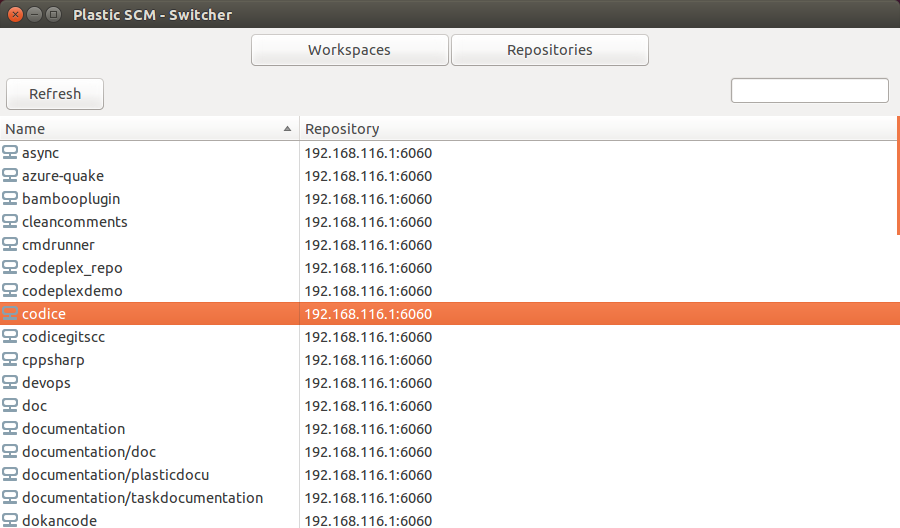
Then I just filled in the dialog to create a new workspace. Unlike the old GUI, all the common dialogs to browse the filesytem and so on are now native and more comfortable to use.
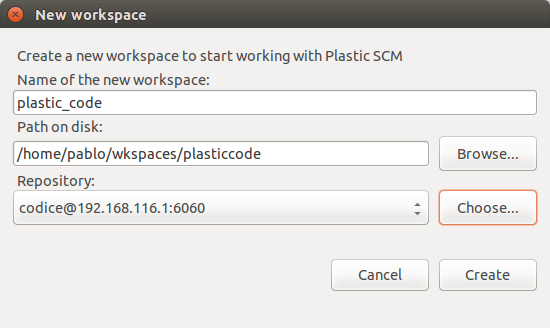
And then the workspace window will show up.
The approach taken by the new GUIs is as follows: one window per workspace, instead of one single window and a workspace switcher on top (the Windows GUI is still designed this way). We are not yet sure whether this is a better option but we’re looking to keep the UI as clean as possible and that’s why we thought it would be a good idea.
Non blocking operations
Another interesting feature we’re playing with in the Linux and Mac UIs is the ability to run operations without locking the entire user interface.I mean, we got rid of as many dialogs as possible, and we created panels to replace the modal dialogs.
The following screenshot shows the update in action but as you can see it is not a dialog anymore, so you can continue using the GUI while the update finishes.
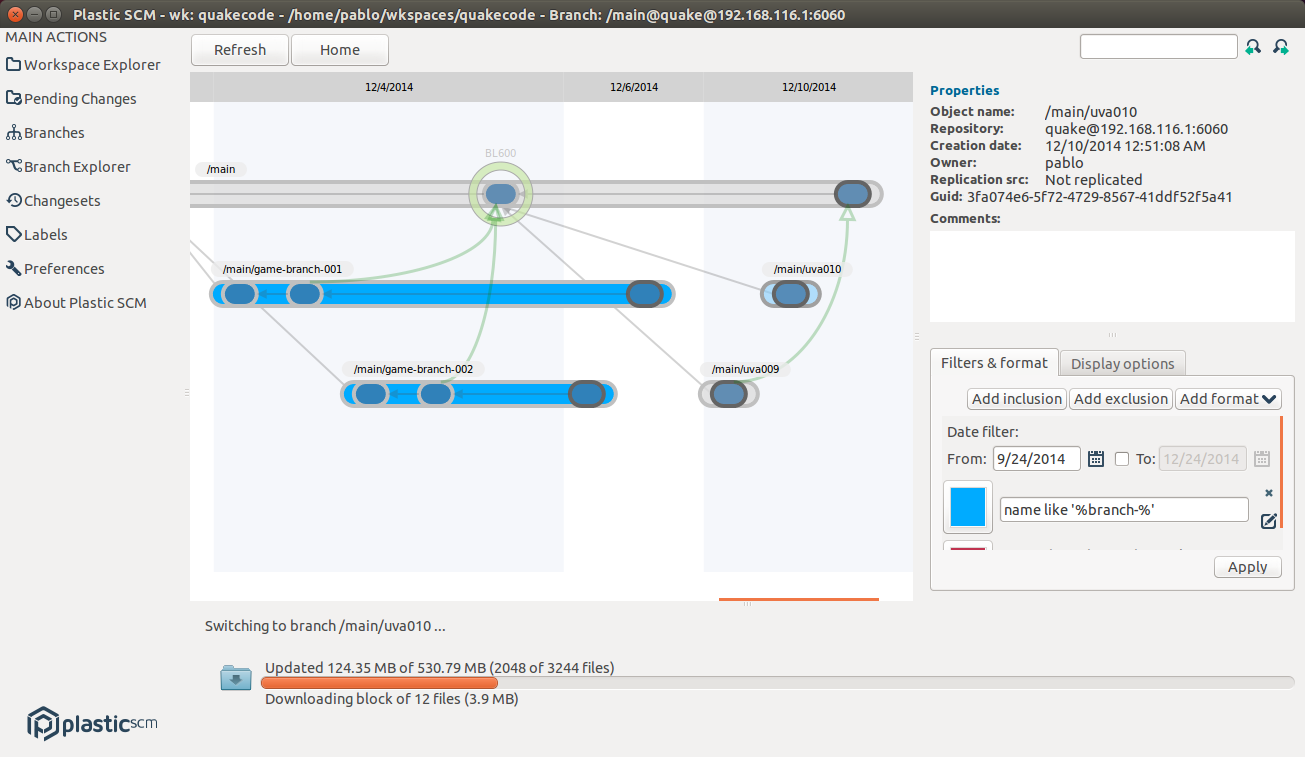
The Mac GUI is also designed around the same idea.
The essentials are already in place
While still in beta, you can see how the Branch Explorer has already been implemented and also most of the options, including conditional format as you can see below.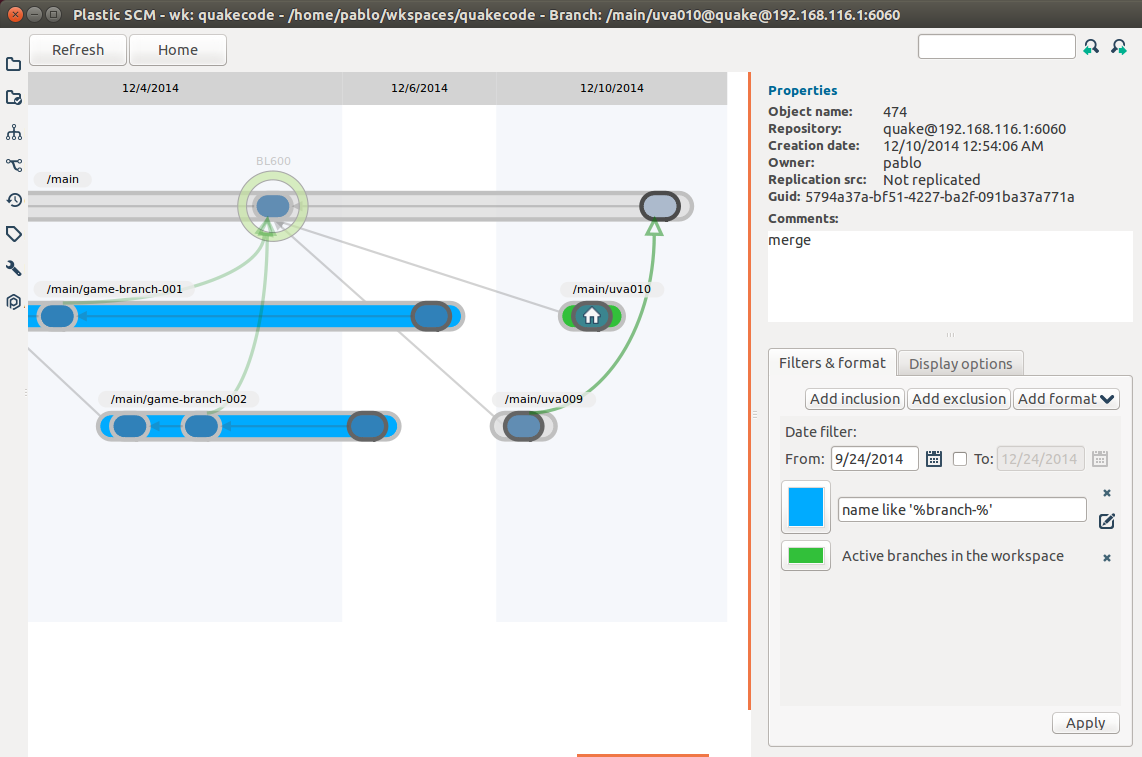
We also modified the layout of the properties panel so now it is always visible on the right information panel while you can play with the filters and display options.
Next steps
Well, needless to say I’m very excited with this new Linux GUI. While definitely we have more users on Windows, it is more and more frequent to get requests from teams who need to use Plastic on Linux and Mac, especially in the gaming industry.So the plan is to continue evolving the Mac and Linux GUIs in parallel. Replication support will come really soon and then we’ll continue with the embedded diff and a redesigned and native 3-way merge tool.



0 comentarios: