Fixing a bug – the branch-per-task way
This is based upon a real story: I have a piece of code that launches an external application, but it wasn’t taking into account the possibility of having programs with spaces in their pathnames. Something like c:\mypath\tool.exe worked, but not something like c:\program files\my tool\tool.exe. To be able to launch such programs, we need to enclose the pathnames in quotes.
The code
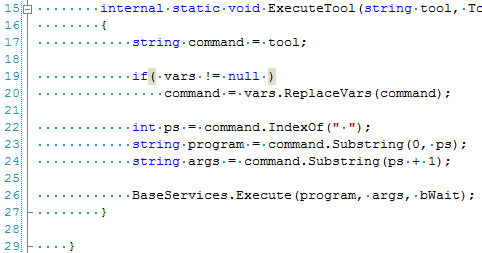
The original code was something like the following and obviously unable to deal with quotes:
Issue tracking system
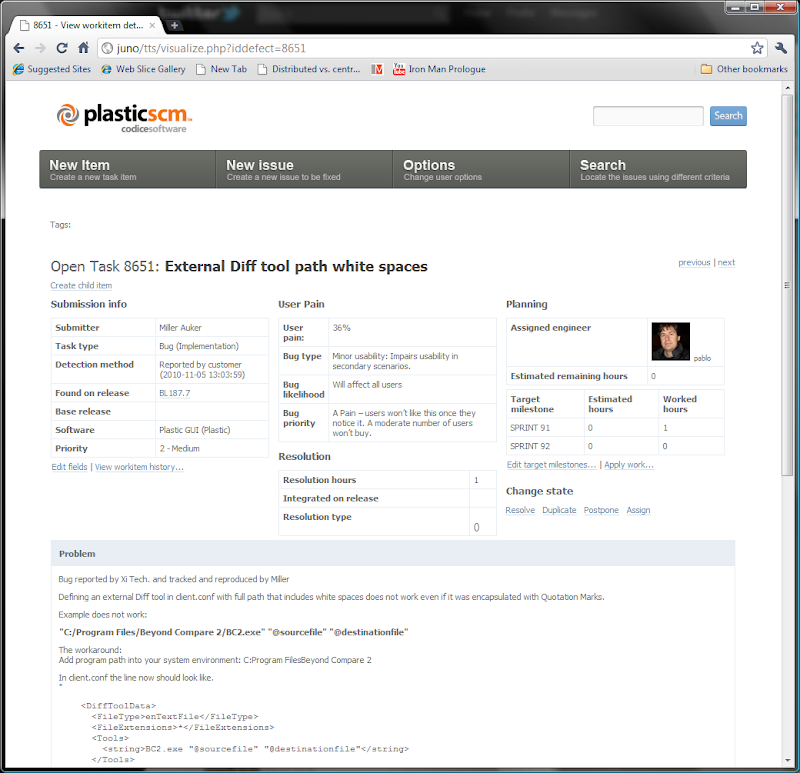
First things first: we need to start with a task in an issue tracking system. Internally at Codice we use TTS (task tracking system), our web-based app for issues. (Yes, if you’re interested in it, I can tell you we’ll be releasing it soon.) The task I’ll be working on is 8651.
Creating a branch for the task
Nothing fancy here: just go to the Branch Explorer and create a new branch for the new task. The branch will be based at a well-known point, the latest known stable release:
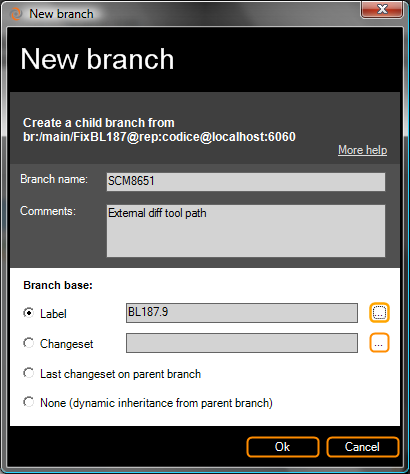
Next, I’ll switch my workspace to the new branch and start editing the code.
Initial refactoring of the code
First, I’m going to modify the code to extract the argument parsing to a new class named ArgsParser. I modify the original code as follows, to create an ArgsParser object and then use its members Program and Args:
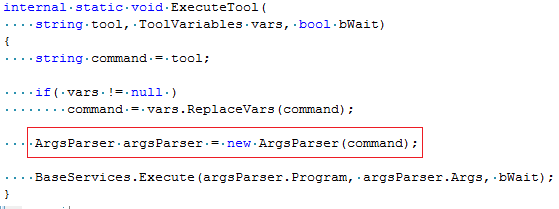
Just after I write this code, I checkin the changes, explaining it was a first step in my refactoring.
Inspect the first change
Look at the Branch Explorer after the first checkin:
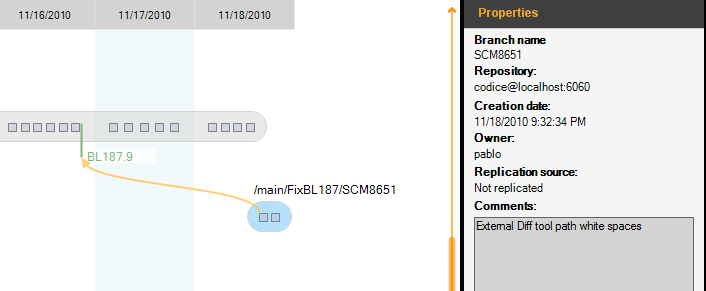
Now I inspect the changes contained in the changeset on branch SCM8651. (It’s the second one you see in the picture. The first cset in a child branch is just there to keep track of its connection to the parent branch).
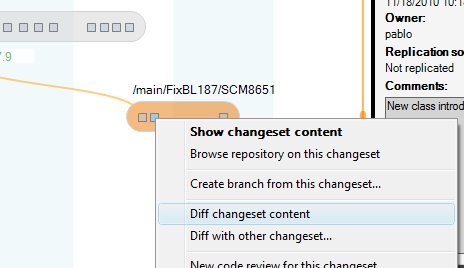
And then I launch the Diff changeset content view, which contains two panes: the top pane shows all the files modified in a cset; the bottom pane shows the line-by-line differences for the currently selected file.
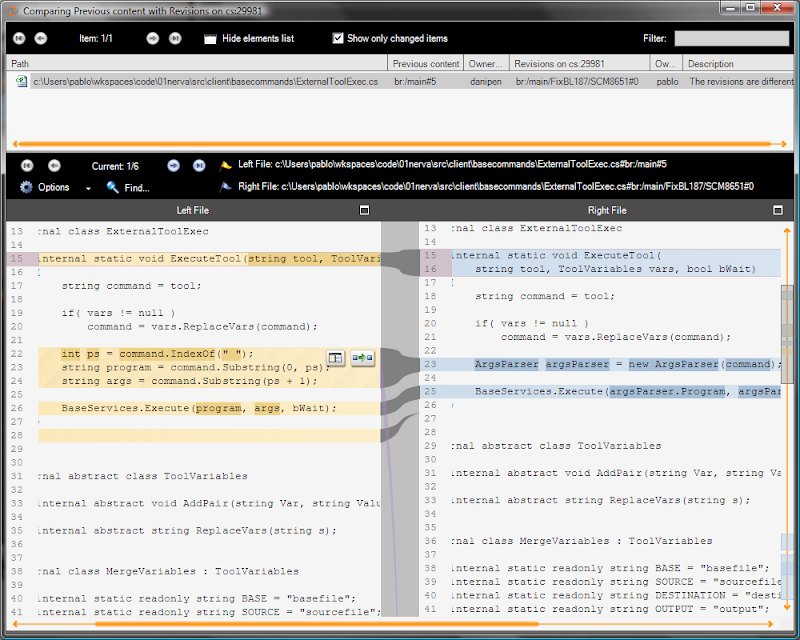
It is a nice interface, isn’t it?
We detect moved code!
But, wait, let’s take a deeper look at this diff. Do you notice the two buttons close to the difference and the line going down? The next figure shows these details:
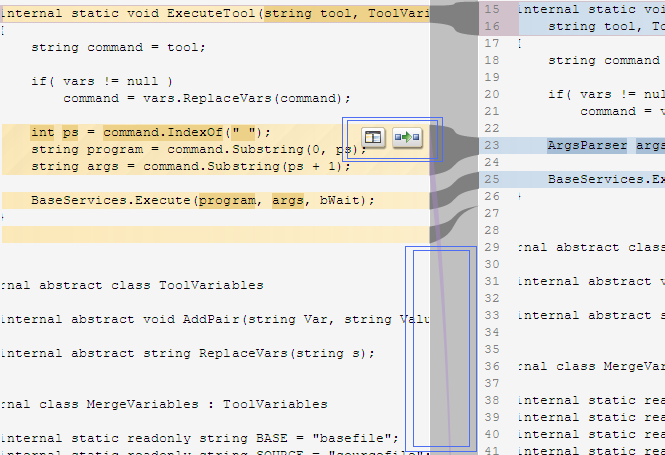
Scrolling down following the line, we get to the ArgsParser class implementation I talked about before:
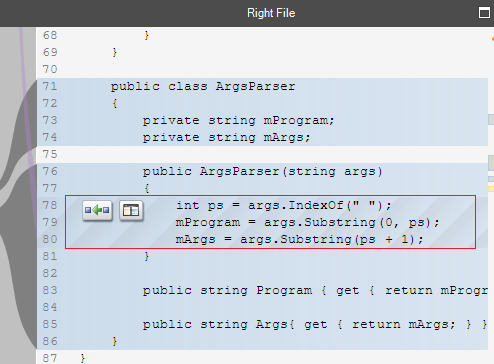
Plastic is able to track the moved code! It has figured out that the original lines of code have been moved to a method in the new ArgsParser class. Amazing, isn’t it??
Even better is the second button over the difference. It runs a sub-diff. I click on it:

The sub-diff shows how I’ve modified the code AFTER moving it to the new location, renamed the variable names, introduced some class members and so on. Plastic is still able to track it!!
Completing the change
After my initial refactoring, the next step is to actually add the code that handles the quoted program pathnames.
I’ll make this change and also add some unit tests to check that my code is fine.
Once I’m done I can go to the Pending changes view in the Plastic GUI (or invoke View Changes in the Visual Studio plugin):
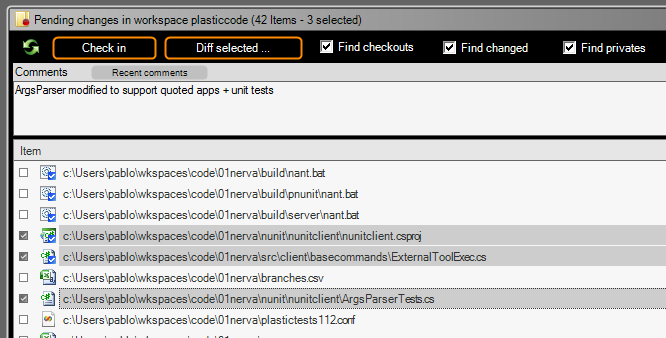
and checkin three files.
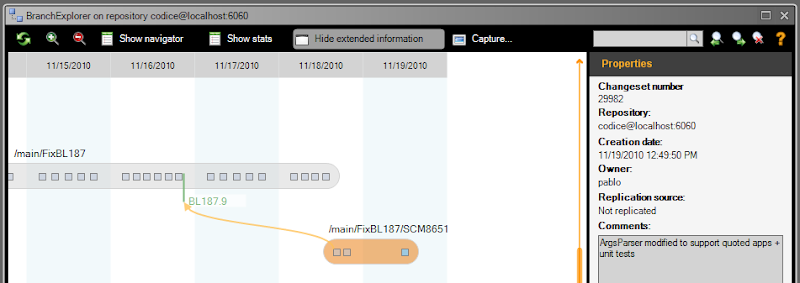
Now I look at how the Branch Explorer renders the current situation, with a new changeset being created containing the second change:
Inspecting the changes
One of the really cool features in Plastic is the ability to “walk changesets” inside branches, one by one. If you’re careful doing your checkins (as I have been here) your branches will tell a story, a very complete one, describing every change in detail and greatly helping reviewers. (Sometimes just seeing all the differences in one step is not as useful as walking the changes one by one, nor so easy to understand.)
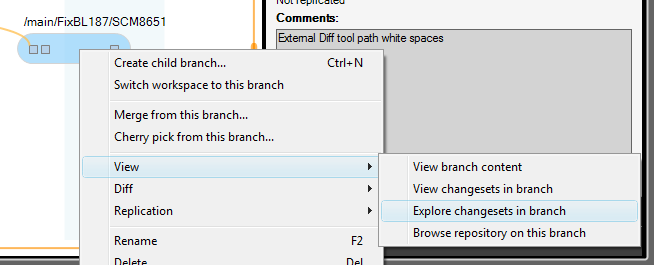
Here’s the view created by the Explore changesets in branch command:
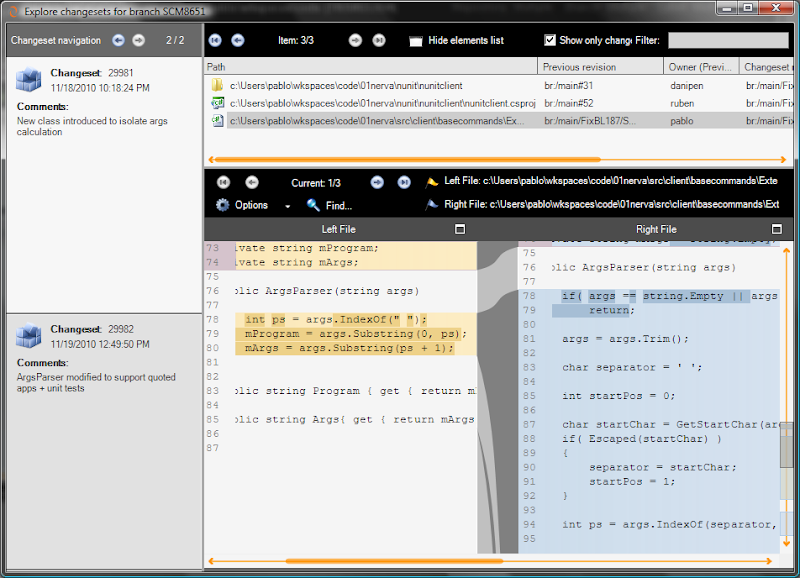
This view is very much like the one I used above, Diff changeset content, but with an extra dimension. Instead of exploring the contents of a single changeset, I can now explore all the changesets of my branch.
As you can see, walking the changes one by one is very, very easy this way.
For distributed developers – push your changes back
Once I’m done, I’ll run my test suite and then go to our issue tracking system and set the task as finished.
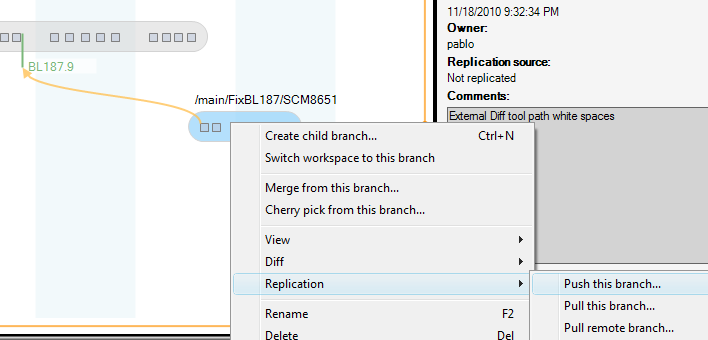
Since I’m working with a local Plastic SCM server on my laptop (remember Plastic is a DVCS), the last step is pushing my branch back to the main server. I can use the Branch Explorer for this, too, using the Push this branch command:
Wrapping up
Now it is your turn to ask questions! Do you see the beauty of branch per task (or task oriented, if you prefer) development, using Plastic SCM’s powerful visual tools?


Great. You branched and fixed the bug. When did you merge the change back into something that will actually be deployed? I don't see that anywhere.
ReplyDelete@Anonymous: do you want me to explain how to perform a merge with Plastic?
ReplyDeleteI can do it but it wasn't the main goal of my post.
It is just about switching back to the destination branch (1 click) and merging from the source (the task branch). Really easy.
Or am I missing anything?
pablo
I don't get it. Why not just fix the bug and commit it on trunk?
ReplyDelete@Anonymous. Ok, there are several reasons why having your own branch for a task is simply much better than just commiting to trunk. First of all is to avoid breaking the build at all costs. Then to have the ability to do as many intermediate checkins as you need.
ReplyDeleteTake a look at our quick start
Having a separate branch also allows the same changeset to be merged into different development versions. As a product developer, we often have the current version, the next version in development and then some one-off versions from the current version incorporating specific, urgent changes for specific customers.
ReplyDeleteThose changes both appear in the one-off versions for those customers and then have to be merged into the next-release version as well. And sometimes we have to back merge during testing of a release version as well because it is realized that we need the change in the upcoming release, not the next future release.
Merging just to one trunk *might* work when you are doing work in-house without multiple customers. However, I have worked in those environments as well, and change sets with the ability to merge into multiple versions has always resulted in benefits from a testing and control perspective.